- RETURN TO KICKOUT FLASHING MAIN PAGE
 DAMAGE THAT COULD HAVE BEEN AVERTED DAMAGE THAT COULD HAVE BEEN AVERTED
 Omitting the needed kickout flashings almost always leads to major damage inside the wood framing behind the exterior cladding. Sometimes this damage is totally concealed until the exterior is opened up, and other times, the damage is blatantly obvious, even when viewed from across the street. Omitting the needed kickout flashings almost always leads to major damage inside the wood framing behind the exterior cladding. Sometimes this damage is totally concealed until the exterior is opened up, and other times, the damage is blatantly obvious, even when viewed from across the street.
-
 |
 |
|
PLEASE CLICK ON THE IMAGES TO SEE LARGER VIEWS
|
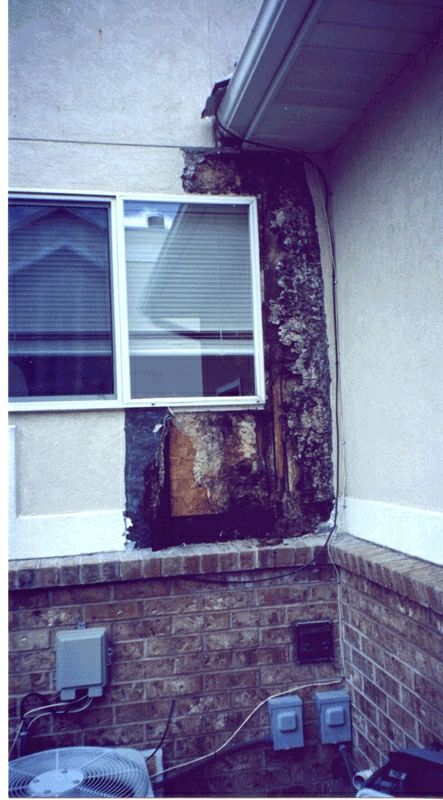
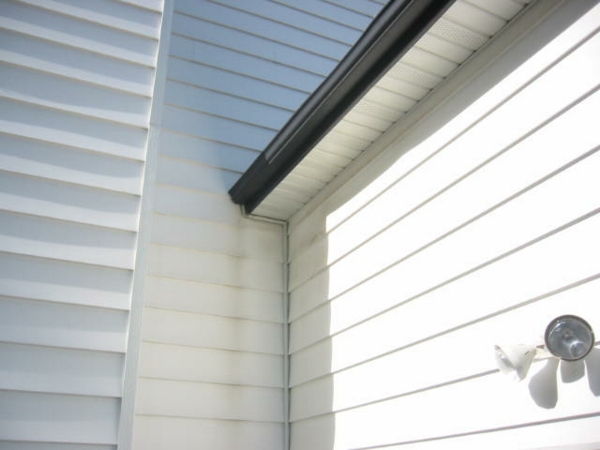
| This Salt Lake County, Utah, hardcoat stucco home was installed with the needed kickout flashings. Unfortunately, the installers botched the installation and both water damage and rot were identified on the wall below this roof termination. The kickout is just one major element in a flashing package that should also include house wrap or felt paper. So, just because you have kickout flashing, there may still be damage. This is where an expert stucco inspection can help clients determine the extent of the damage without full removal of the stucco system first. |
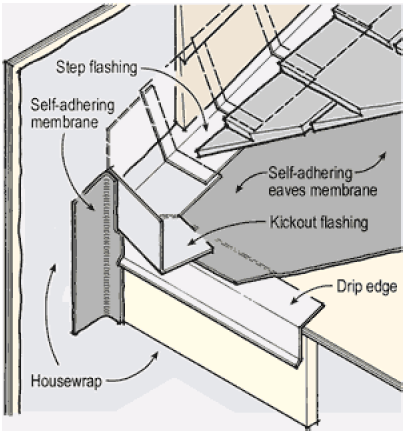
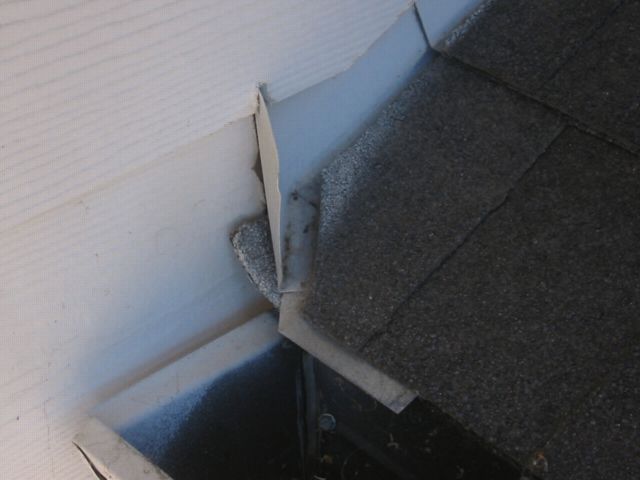
 Here is a kickout installation picture from the Ram Builders website (www.RamBuilders.com) that shows how the felt paper should be installed behind the lower roof at the connecting point. Dennis McCoy, of Ram Builders, shared with me that this is an often overlooked detail, yet it is critical to the success of the kickout flashing system. If water does get driven behind the step flashing and kickout flashing, this section of felt paper will, when lapped correctly, divert water away from the wood sheathing and prevent water damage and rot like you have seen in these photo galleries. Here is a kickout installation picture from the Ram Builders website (www.RamBuilders.com) that shows how the felt paper should be installed behind the lower roof at the connecting point. Dennis McCoy, of Ram Builders, shared with me that this is an often overlooked detail, yet it is critical to the success of the kickout flashing system. If water does get driven behind the step flashing and kickout flashing, this section of felt paper will, when lapped correctly, divert water away from the wood sheathing and prevent water damage and rot like you have seen in these photo galleries. |
 |
 |
|
PLEASE CLICK ON THE IMAGES TO SEE LARGER VIEWS
|
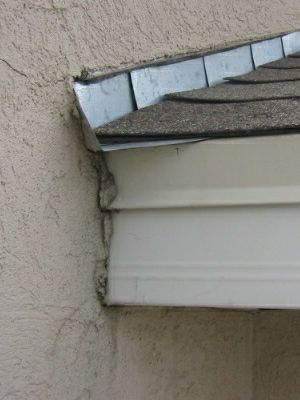
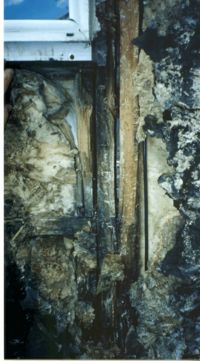
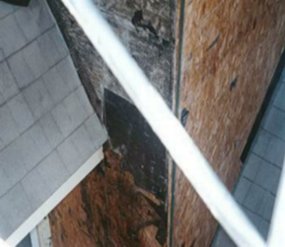
| These two photos illustrate the massive amount of damage that can happen when kickout flashings have not been installed. The majority of the black speckled areas are rotted oriented strand board (OSB). The photo on the right also shows rotted and split 2x4 framing material. I encourage you to click on these images to see the larger versions. It is worth the time. |
- WHAT IS A KICKOUT FLASHING AGAIN?
- Kickout flashings are used where a lower roofline terminates against a vertical wall. The kickout is installed above the rain gutter and/or drip edge flashing where the roof meets a vertical wall. It kicks out rain water and diverts it away from the lower wall. Without a kickout flashing, the water misses the gutter and runs in behind the siding and gets trapped inside the wall. Missing, or incorrectly installed, kickout flashings are often the source of major structural, mold, and rot damage.
 |
 |
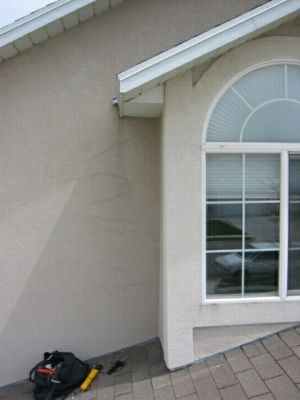
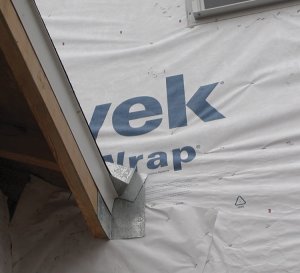
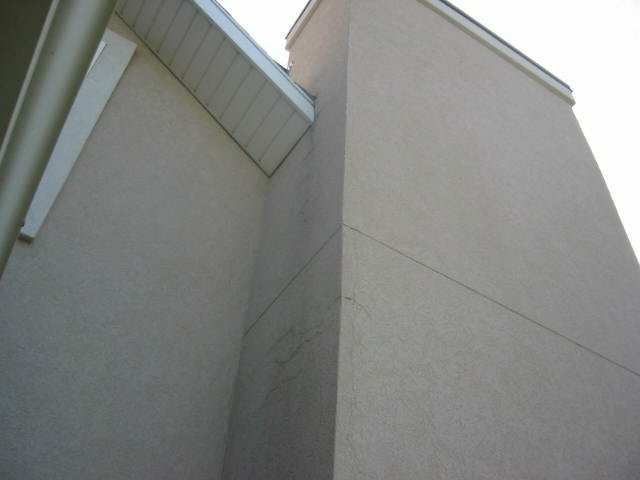
| The image on the left shows what must be done to retrofit kickout flashings into a hard coat stucco system. The image on the right shows the damaged wall below the steep roof termination that lacked the needed kickout flashing. Many people think that steep roofs do not need kickout flashings, but that is just not true. |
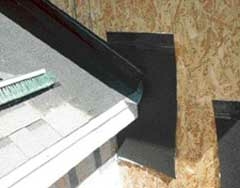
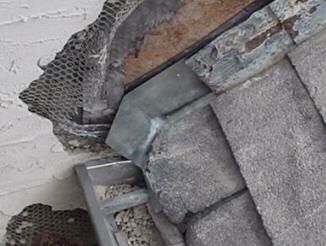
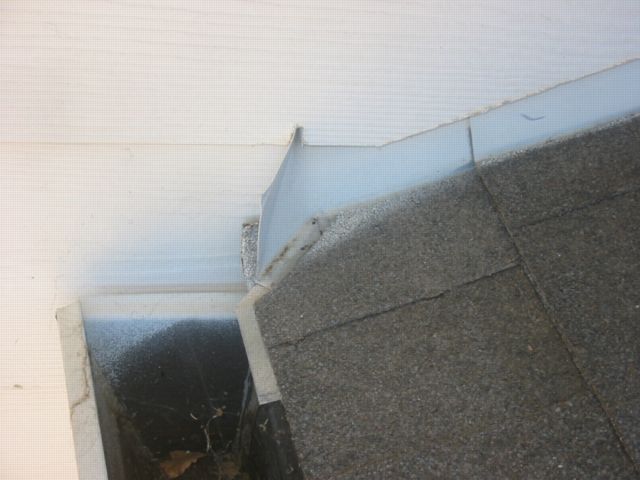
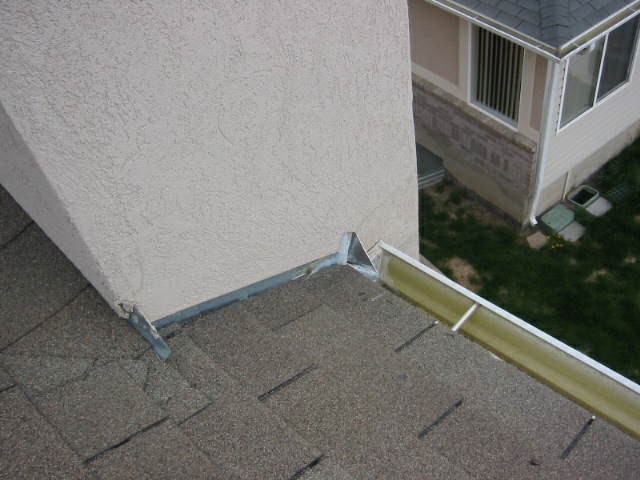
| .Here is a photo from the Building Science website showing a kickout flashing installation looking up from the ground. Notice the extra piece of angled flashing that runs on the fascia and up behind the kickout flashing. Note also the way that the kickout flashing extends over the edge of the roof and drip edge. |
 |
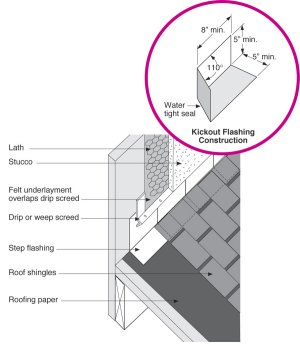 |
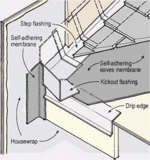
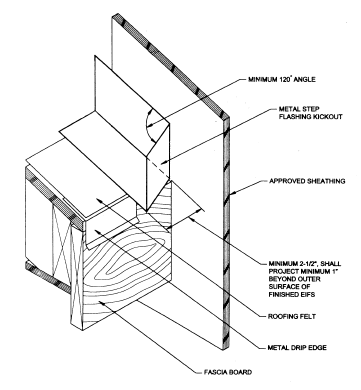
Look closely at this spec drawing to the left and you will notice that the Building Science website wants the kickout flashing to extend 5” up the wall and 5” out on the roof. They also want the seams of the flashing to be water tight. |
RETURN TO KICKOUT FLASHING MAIN PAGE
.................NEWSLETTERS FROM............... MICHAEL LEAVITT & CO INSPECTIONS, INC.
|
|
HOMEOWNERS
|
INSPECTORS
|
AGENTS
|
 |
 |
 |
|
...Inspecting Your... Home
|
Monday Morning Messenger
|
Agent’s Shield of Protection
|
|
PLEASE CLICK ON THE APPROPRIATE IMAGE TO SUBSCRIBE
|
|


